
Jon here, taking over blogging duties this week for an episode on RV maintenance and upgrades.
All about Tires
Having researched the RV forums for months, I found that the frequency of separation of the original Trailer King ST225/75R-15 8 Ply tires was so great that they had earned the nickname “China Bombs.” I had planned to replace our trailer tires after our winter 2017 trip. We came up short of home by 500 miles when, as noted in the last post, one of the tires separated and damaged the trailer.
After two weeks, we picked up the trailer from Sky River RV where they repaired the damage and drove immediately to the closest Discount Tire store in Paso Robles to replace the five tires, including the spare. We didn’t want to chance another tire blowing out before we got the rig home.
I found the Carlisle brand received great reviews on the forums. So we went with the Carlisle Radial Trail HD ST225/75R15 10 Ply (instead of the 8 ply) for an increased load rating and peace of mind.
General Cleaning and Maintenance
After putting about 4500 miles on the trailer, it was time for some much-needed cleaning and maintenance. The first thing we do is tag-team the cleaning of the trailer interior. I clean the toilet, sinks, and the refrigerator. Linda vacuums, dusts, and wipes down the cabinetry. Then I come in and scrub the floors with the Swiffer wet jet. Next is the exterior. Linda climbs the ladder to scrub the roof and inspect all the seals. When she finds subpar seals, I fetch the Dicor self-leveling sealing caulk made especially for RV rubber roofs to make the necessary repairs. Once done, I wash the back, sides, and of course the bug encrusted front of the fifth-wheel as well as the awning.
Running Lights
The next thing on the list is to repair anything that had become inoperable. One item had driven me crazy. Whenever we hook up the trailer to the truck, we always operate the lights so that the running lights illuminate. For no apparent reason, the running lights quit. I found that a 15-amp fuse on the truck’s fuse panel had blown. I replaced the fuse and the lights worked…for about a minute. Realizing there must be a short somewhere in the running lights circuit, I left the blown fuse in and didn’t worry about the running lights. Whatever the cause, it did not affect any other lights on the trailer and I could figure it out once we got home.
I got lucky. Another round of research revealed the blown fuse was a common problem on many Cougar fifth wheels. The wire that connects the right front side marker light with the left front side marker light runs under the fiberglass skin and on top of a metal cross brace. Apparently, the wire over time smashes against the metal cross brace when the trailer is hooked to the truck, causing a short when the wire’s insulation wears through. The wire was so smashed I couldn’t pull it out. The fix was to run a new wire through the front storage and abandon the old wire. That fixed it! Ray Burr of www.loveyourrv.com figured this out. Ray has a Cougar 5th Wheel trailer too and he experienced the exact same problem. Thanks Ray!
Solar Power
With the coming camping season nearly upon us, I decided to research solar panels for the trailer with the goal to provide enough juice to charge the batteries when camping without electrical hookups. I found a complete solar panel kit that looked like it would be a good fit for the Cougar.

Last year I had upgraded our single 12-volt deep cycle battery that was good for about 80 amp hours to two 6 volt deep-cycle golf cart batteries. The two 6-volt batteries wired in series gives 12 volts but supplies 230 amp hours.

With the bigger battery bank already installed, I was setup to install the solar panels. I ordered through Amazon the Renogy kit that included two 100-watt monocrystalline solar panels, one charge controller, all the wires for connecting everything together, plus all the mounting hardware.
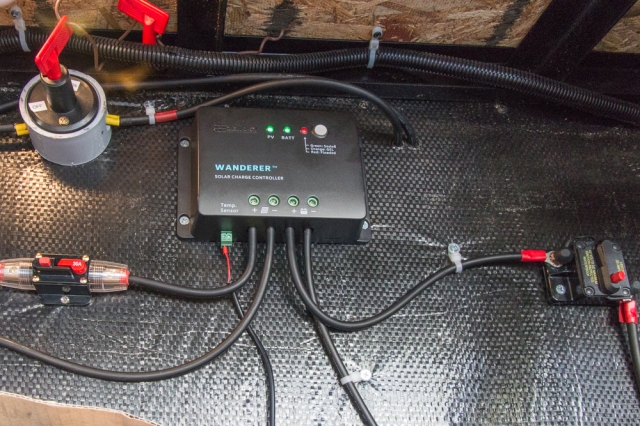

I was concerned about drilling holes for the mounting brackets in the roof of the trailer but after consulting various forums and videos, I felt confident I could do the work without causing any leaks. I created a short video of my install of the system here: YouTube Video.
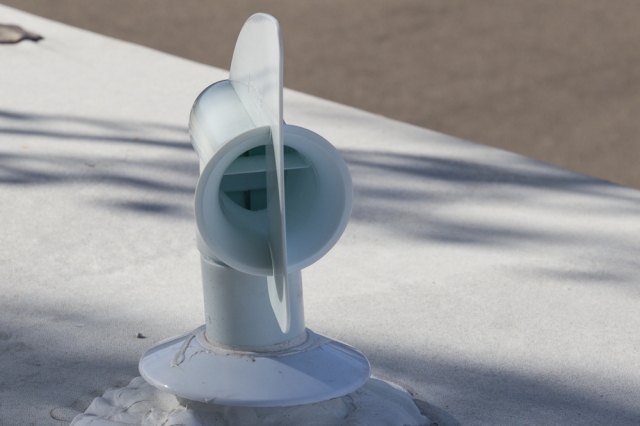
I also replaced the sewer plumbing vent while completing the installation. We’ve not had problems with smells but thought I’d give the Camco Cyclone vent a try.
Suspension Upgrade
The final chore before our next trip was a suspension upgrade. When I learned the trailer suspensions supplied to the trailer manufacturers do not allow for greasing the shackles on the leaf springs, I was appalled. Even worse, the thicknesses of the shackles are subpar and the bushings used are made of some type of plastic. Bottom line is these items wear out in as little as 10,000 miles and we were near that range. The fix is to install a heavy-duty shackle upgrade kit by MorRyde. For more information, go here: MorRyde Shackle Upgrade Kit.
This job requires lifting the trailer and removing the wheels (one side at a time) so the suspension can be disassembled and reassembled. I just don’t have enough space beside our house to safely attempt this job. So we made an appointment six weeks ago at Happy Daze RV in Livermore, California and the work is being done as I write this.
With new tires, a clean trailer, working running lights, a new solar system, and a safer suspension, it looks like we are ready to pack up and hit the road for our summer 2017 adventure. As soon as Happy Daze calls to say the work is completed, of course.

You are going to love those new shackles, Jon!
LikeLike
Can’t wait to give them a try.
LikeLiked by 1 person
Great blogging, Jon.
LikeLike
I have a good teacher 😉
LikeLike